1. Intro
In this lesson, we'll look at git tag, git branch, git checkout and git merge.With git tag, you'll be able to add tags to specific commits.
A tag is an extra label for a commit that can indicate useful information, like, this is the beta release.
With git branch, you'll be able to create branches that let you develop different features of your project in parallel without getting confused as to which commits belong to which feature.
With git checkout, you'll be able to switch between different branches and tags.
Git merge is amazingly helpful, because you can use it to take changes on different branches and combine them together automatically.
2. Tagging
So far in this course, we've been zoomed in on the specific Git commands. We've learned how they work in detail and what it looks like running them on the Terminal.
Let's zoom out a bit to look at how a Git tag fits into a repository.
Where Are We?
You can do these steps in either project, but I'm be doing them in the
new-git-project project.
Let's take a look at the log of the project so far:

Git Tag Command
Pay attention to what's shown (just the SHA and the commit message)
The command we'll be using to interact with the repository's tags is the
git tag command:$ git tag -a v1.0
This will open your code editor and wait for you supply a message for the tag. How about the message "Ready for content"?

CAREFUL: In the command above (git tag -a v1.0) the-aflag is used. This flag tells Git to create an annotatedflag. If you don't provide the flag (i.e.git tag v1.0) then it'll create what's called a lightweight tag.Annotated tags are recommended because they include a lot of extra information such as:
- the person who made the tag
- the date the tag was made
- a message for the tag
Because of this, you should always use annotated tags.
Verify Tag
After saving and quitting the editor, nothing is displayed on the command line. So how do we know that a tag was actually added to the project? If you type out just
git tag, it will display all tags that are in the repository.
So we've verified that it's in the repository, but let's actually see where it is inside the repository. To do that, we'll go back to our good old friend,
git log!Git Log's --decorate Flag
As you've learned,
git log is a pretty powerful tool for letting us check out a repository's commits. We've already looked at a couple of its flags, but it's time to add a new one to our toolbelt. The --decorate flag will show us some details that are hidden from the default view.
Try running
git log --decorate now!💡
--decorateFlag Changes in Git 2.13 💡In the 2.13 update to Git, thelogcommand has changed to automatically enable the--decorateflag. This means that you do not need to include the--decorateflag in your command, since it is automatically included, anyway! So the following commands result in the exact same output:$ git log --decorate $ git logCheck out the 2.13 release notes.

The tag information is at the very end of the first line:
commit 6fa5f34790808d9f4dccd0fa8fdbc40760102d6e (HEAD -> master, tag: v1.0)
See how it says
tag: v1.0? That's the tag! Remember that tags are associated with a specific commit. This is why the tag is on the same line as the commit's SHA.HEAD -> master?
Did you notice that, in addition to the tag information being displayed in the log, the--decoratealso revealedHEAD -> master? That's information about a branch! We'll be looking at branches in Git, next.
Deleting A Tag
What if you accidentally misspelled something in the tag's message, or mistyped the actual tag name (
v0.1 instead of v1.0). How could you fix this? The easiest way is just to delete the tag and make a new one.
A Git tag can be deleted with the
-d flag (for delete!) and the name of the tag:$ git tag -d v1.0
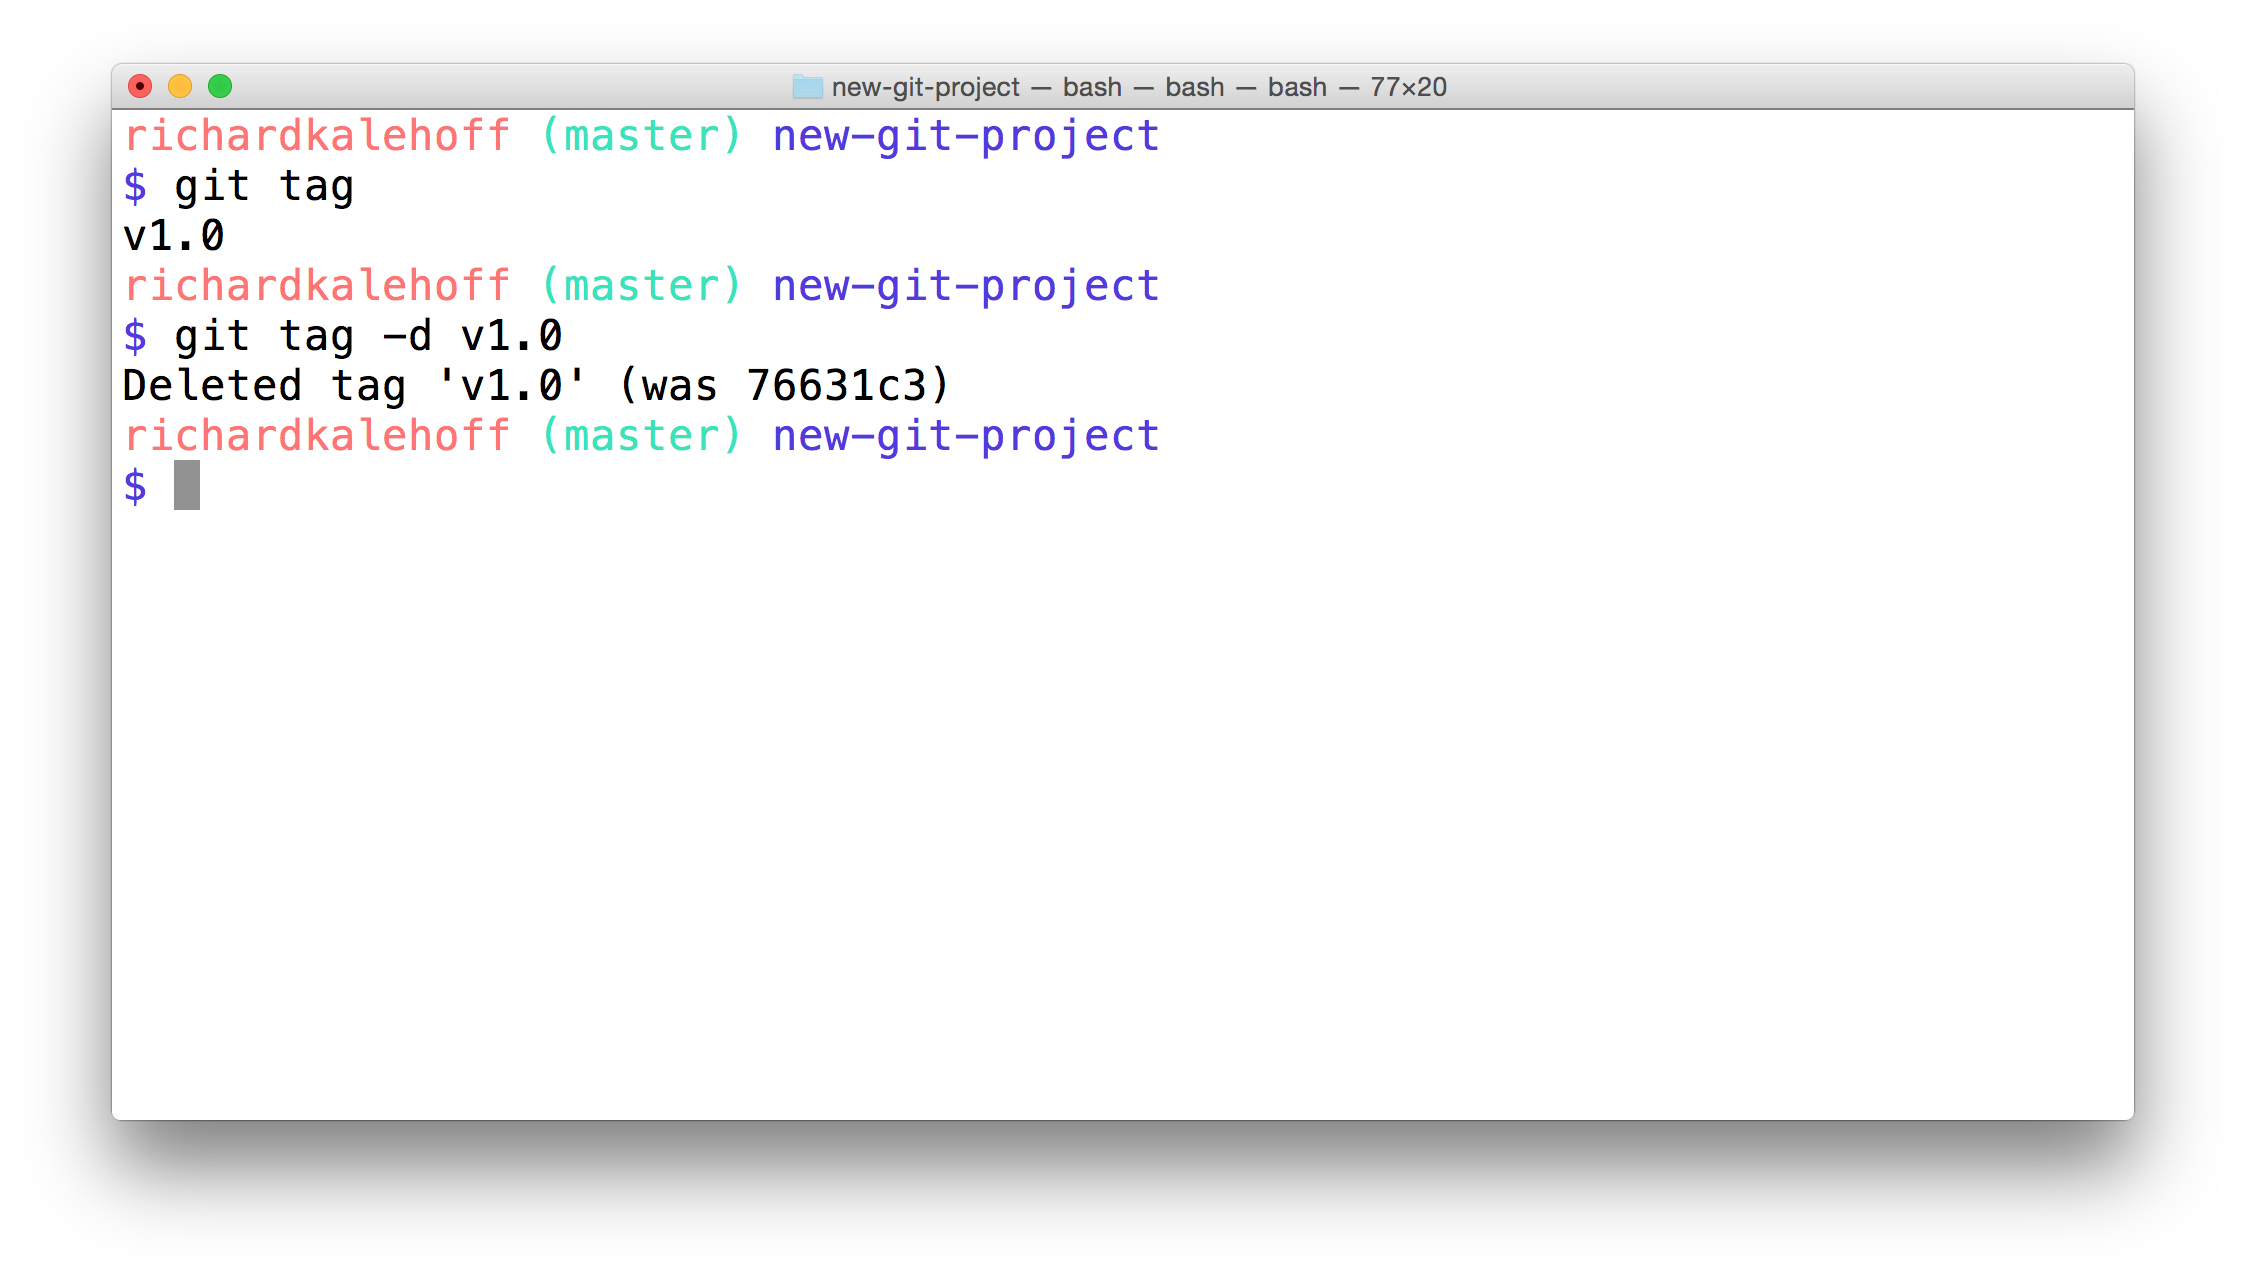
The Terminal application showing the removal of a tag by using the
-d flag. The command that is run is git tag -d v1.0.Adding A Tag To A Past Commit
Running
git tag -a v1.0 will tag the most recent commit. But what if you wanted to tag a commit that occurred farther back in the repo's history?
All you have to do is provide the SHA of the commit you want to tag!
$ git tag -a v1.0 a87984
(after popping open a code editor to let you supply the tag's message) this command will tag the commit with the SHA
a87084 with the tag v1.0. Using this technique, you can tag any commit in the entire git repository! Pretty neat, right?...and it's just a simple addition to add the SHA of a commit to the Git tagging command you already know.Tag Older Commit?
Using the following
git log --oneline information, what command would you run to give the commit with the message "style page header" with a tag of beta?2a9e9f3 add breakpoint for large-sized screens
137a0bd add breakpoint for medium-sized screens
c5ee895 add space around page edge
b552fa5 style page header
f8c87c7 convert social links from text to imagesGit Tag Recap
To recap, the
git tag command is used to add a marker on a specific commit. The tag does not move around as new commits are added.$ git tag -a beta
This command will:
- add a tag to the most recent commit
- add a tag to a specific commit if a SHA is passed
Further Research
- Git Basics - Tagging from the Git Book
- Git Tag from the Git Docs
3. Branching
It's time to delve into the wonderful world of branches! Branches in Git are flexible and let you do some really powerful things. Before we get into the nitty gritty details of the commands, let's take another step back and look at the big picture of what branches are and how they function.
So that's the big picture of how branches work and how to switch between branches. Did you know that you've already seen the master branch on the command line? Because of the setup files you added in the first lesson, the current branch is displayed right in the command prompt.

The git branch command
The
git branch command is used to interact with Git's branches:$ git branch
It can be used to:
- list all branch names in the repository
- create new branches
- delete branches
If we type out just
git branch it will list out the branches in a repository:
Create A Branch
To create a branch, all you have to do is use
git branch and provide it the name of the branch you want it to create. So if you want a branch called "sidebar", you'd run this command:$ git branch sidebar
The git checkout Command
Remember that when a commit is made that it will be added to the current branch. So even though we created the new sidebar, no new commits will be added to it since we haven't switched to it, yet. If we made a commit right now, that commit would be added to the master branch, not the sidebar branch. We've already seen this in the demo, but to switch between branches, we need to use Git's checkout command.
$ git checkout sidebar
It's important to understand how this command works. Running this command will:
- remove all files and directories from the Working Directory that Git is tracking
- (files that Git tracks are stored in the repository, so nothing is lost)
- go into the repository and pull out all of the files and directories of the commit that the branch points to
So this will remove all of the files that are referenced by commits in the master branch. It will replace them with the files that are referenced by the commits in the sidebar branch. This is very important to understand, so go back and read these last two sentences.
The funny thing, though, is that both sidebar and master are pointing at the same commit, so it will look like nothing changes when you switch between them. But the command prompt will show "sidebar", now:
Remember that when a commit is made that it will be added to the current branch. So even though we created the new
sidebar, no new commits will be added to it since we haven't switched to it, yet. If we made a commit right now, that commit would be added to the master branch, not the sidebar branch. We've already seen this in the demo, but to switch between branches, we need to use Git's checkout command.$ git checkout sidebar
It's important to understand how this command works. Running this command will:
- remove all files and directories from the Working Directory that Git is tracking
- (files that Git tracks are stored in the repository, so nothing is lost)
- go into the repository and pull out all of the files and directories of the commit that the branch points to
So this will remove all of the files that are referenced by commits in the master branch. It will replace them with the files that are referenced by the commits in the sidebar branch. This is very important to understand, so go back and read these last two sentences.
The funny thing, though, is that both
sidebar and master are pointing at the same commit, so it will look like nothing changes when you switch between them. But the command prompt will show "sidebar", now:
Branches In The Log
The branch information in the command prompt is helpful, but the clearest way to see it is by looking at the output of git log. But just like we had to use the --decorate flag to display Git tags, we need it to display branches.
$ git log --oneline --decorate
The branch information in the command prompt is helpful, but the clearest way to see it is by looking at the output of
git log. But just like we had to use the --decorate flag to display Git tags, we need it to display branches.$ git log --oneline --decorate
This is what my log output displays (yours might look different depending on what commits you've made):

In the output above, notice how the special "HEAD" indicator we saw earlier has an arrow pointing to the sidebar branch. It's pointing to sidebar because the sidebar branch is the current branch, and any commits made right now will be added to the sidebar branch.
The Active Branch
The command prompt will display the active branch. But this is a special customization we made to our prompt. If you find yourself on a different computer, the fastest way to determine the active branch is to look at the output of the git branch command. An asterisk will appear next to the name of the active branch.
The command prompt will display the active branch. But this is a special customization we made to our prompt. If you find yourself on a different computer, the fastest way to determine the active branch is to look at the output of the
git branch command. An asterisk will appear next to the name of the active branch.
Delete A Branch
Git Branch Recap
To recap, the git branch command is used to manage branches in Git:
# to list all branches
$ git branch

# to create a new "footer-fix" branch
$ git branch footer-fix

# to delete the "footer-fix" branch
$ git branch -d footer-fix
- list out local branches 2. Tagging
- create new branches
- remove branches
To recap, the
git branch command is used to manage branches in Git:# to list all branches
$ git branch
# to create a new "footer-fix" branch
$ git branch footer-fix
# to delete the "footer-fix" branch
$ git branch -d footer-fix
This command is used to:
- list out local branches 2. Tagging
- create new branches
- remove branches
Further Research
- Git Branching - Basic Branching and Merging from the Git Docs
- Learn Git Branching
- Git Branching Tutorial from the Atlassian Blog
- Git Branching - Basic Branching and Merging from the Git Docs
- Learn Git Branching
- Git Branching Tutorial from the Atlassian Blog
4. Branching Effectively
Alright! Now that you've learned how to create, list, and delete branches, let's put that knowledge to use!
First, make sure we're on the same page and have the same starter code. We're going to be working in the
new-git-project project. The project has the following files:index.htmlcss/app.css(empty)js/app.js(empty)
The CSS and JavaScript files are empty. Make sure the index file has the following content:
<html lang="en">
<head>
    <meta charset="utf-8">
    <title>Blog Project</title>
    <meta name="viewport" content="width=device-width, initial-scale=1">
    <meta name="description" content="">
    <link rel="stylesheet" href="css/app.css">
</head>
<body>

    <header>
        <h1>Expedition</h1>
    </header>

    <div class="container">
        <main>

        </main>
    </div>

    <footer>
        Made with ♥ @ Udacity
    </footer>
    <script src="js/app.js"></script>
</body>
</html>
The Game Plan
Right now we have all of our code on the
master branch (which is the default branch). We're about to work with branches, by:- adding content to them
- creating new branches
- switching back and forth between them
Let's use branches to make the following changes:
- on the master branch - add a default color to the page
- create a sidebar branch - create a sidebar for the page
- on the master branch - change the heading of the page
- on the sidebar branch - add more content to the sidebar
- create a footer branch - add social links to the footer
Change 1 - Add Page Color
Make sure you're on the
master branch and add the following content to css/app.css:body {
background-color: #00cae4;
}
Save the file. Then add the file to the staging index and commit it to the repository.

Change 2 - Add Sidebar
Let's add a sidebar to the page. But let's say that we're not really sure if we like the new background color. So we'll place the sidebar branch on the commit before the one that sets the page's color. Your SHAs will be different, but, for me, the commit that's before the one that adds the color has a SHA of
5bfe5e7. So adding the branch to that commit would look like:$ git branch sidebar 5bfe5e7
Now use the
git checkout command to switch to the new sidebar branch. Running a git log --oneline --decorateshows me:
Did you notice that the
master branch does not display in the output? Where did it go!?! Is it lost? Don't worry, it's still there, we'll see how to get it to display in just a second.
But first, in your code editor, switch to the
app.css file. Notice that it does not have the CSS we previously entered! Because of this, if you load the project up in the browser, the page won't have a colored background. This makes sense since the CSS file is empty, but do you know why?
Create a sidebar by adding the following <div class="container">
<main>
</main>
</div>
<aside>
<h2>About Me</h2>
<p>Lorem ipsum dolor sit amet, consectetur adipisicing elit. Eos, debitis earum molestias veniam suscipit aliquam totam exercitationem tempore neque vitae. Minima, corporis pariatur facere at quo porro beatae similique! Odit.</p>
</aside>
<footer>
Made with ♥ @ Udacity
</footer>
element.
Feel free to add any content inside the
Create a sidebar by adding the following
<div class="container">
    <main>

    </main>
</div>


<aside>
    <h2>About Me</h2>

    <p>Lorem ipsum dolor sit amet, consectetur adipisicing elit. Eos, debitis earum molestias veniam suscipit aliquam totam exercitationem tempore neque vitae. Minima, corporis pariatur facere at quo porro beatae similique! Odit.</p>
</aside>


<footer>
    Made with ♥ @ Udacity
</footer>
I added my
element.
Feel free to add any content inside the
⚠️ Don't Change the CSS
WARNING: It's very important that you do not change the CSS file.
We'll change it later, but if you make a change right now, we'll end up having what's known as a "merge conflict". We'll manually cause a merge conflict in a bit, but we don't want to have one right now, so just don't make any changes to the CSS file, yet.
WARNING: It's very important that you do not change the CSS file.We'll change it later, but if you make a change right now, we'll end up having what's known as a "merge conflict". We'll manually cause a merge conflict in a bit, but we don't want to have one right now, so just don't make any changes to the CSS file, yet.
Change 3 - Change Heading On Master
Let's switch back to the master branch and update the page heading.
Use the git checkout command to switch back to the masterbranch. (Notice that the HTML for the new sidebar is no longer there(!) because all that code is stored safely on the sidebarbranch.)
Now change the
git checkout command to switch back to the masterbranch. (Notice that the HTML for the new sidebar is no longer there(!) because all that code is stored safely on the sidebarbranch.)
Change 4 - Add More Content To Sidebar
Switch back to the sidebar branch (notice, again, that content we've added to the master branch isn't visible on the sidebarbranch).
Now just add some content inside the index.html file and make a commit.
Switch back to the
sidebar branch (notice, again, that content we've added to the master branch isn't visible on the sidebarbranch).
Now just add some content inside the
Again, make sure that you do not make changes to the CSS file.
Now save the
index.html file and make a commit.Change 5 - Add Social Links To Footer
We've made a number of changes, and we're about to make our last one. Let's add some social icons to the page's footer. For grins and giggles, let's make this change on a new footer branch that's based off the master branch. So we need to create a new footerbranch, first.
We've made a number of changes, and we're about to make our last one. Let's add some social icons to the page's footer. For grins and giggles, let's make this change on a new footer branch that's based off the
master branch. So we need to create a new footerbranch, first.💡 Switch and Create Branch In One Command💡
The way we currently work with branches is to create a branch with the git branch command and then switch to that newly created branch with the git checkoutcommand.
But did you know that the git checkout command can actually create a new branch, too? If you provide the -b flag, you can create a branch and switch to it all in one command.
$ git checkout -b richards-branch-for-awesome-changes
It's a pretty useful command, and I use it often.
Let's use this new feature of the git checkout command to create our new footer branch and have this footer branch start at the same location as the master branch:
$ git checkout -b footer master
Now if we run a quick git log --oneline --decorate, we should see (your commit messages might be different):
The way we currently work with branches is to create a branch with thegit branchcommand and then switch to that newly created branch with thegit checkoutcommand.But did you know that thegit checkoutcommand can actually create a new branch, too? If you provide the-bflag, you can create a branch and switch to it all in one command.$ git checkout -b richards-branch-for-awesome-changesIt's a pretty useful command, and I use it often.
Let's use this new feature of the
git checkout command to create our new footer branch and have this footer branch start at the same location as the master branch:$ git checkout -b footer master
Now if we run a quick
git log --oneline --decorate, we should see (your commit messages might be different):
Add Social Links
Now that we're on a new branch, let's add some social links to the page's footer. I've added the following content:
<footer>

    <section>
        <h3 class="visuallyhidden">Social Links</h3>
        <a class="social-link" href="https://twitter.com/udacity">
            <img src="img/social-twitter.png" alt="Twitter">
        </a>
        <a class="social-link" href="https://www.instagram.com/udacity/">
            <img src="img/social-instagram.png" alt="Instagram">
        </a>
        <a class="social-link" href="https://plus.google.com/+Udacity">
            <img src="img/social-google.png" alt="Google Plus">
        </a>
    </section>

</footer>
Now that we're on a new branch, let's add some social links to the page's footer. I've added the following content:
<footer>
<section>
<h3 class="visuallyhidden">Social Links</h3>
<a class="social-link" href="https://twitter.com/udacity">
<img src="img/social-twitter.png" alt="Twitter">
</a>
<a class="social-link" href="https://www.instagram.com/udacity/">
<img src="img/social-instagram.png" alt="Instagram">
</a>
<a class="social-link" href="https://plus.google.com/+Udacity">
<img src="img/social-google.png" alt="Google Plus">
</a>
</section>
</footer>
Feel free to link to your own social accounts.
See All Branches At Once
We've made it to the end of all the changes we needed to make! Awesome job!
Now we have multiple sets of changes on three different branches. We can't see other branches unless in the git log output unless we switch to a branch. Wouldn't it be nice if we could see allbranches at once in the git log output.
As you've hopefully learned by now, the git log command is pretty powerful and can show us this information. We'll use the new --graph and --all flags:
$ git log --oneline --decorate --graph --all
--graph flag adds the bullets and lines to the leftmost part of the output. This shows the actual branching that's happening. The --all flag is what displays all of the branches in the repository.
Running this command will show all branches and commits in the repository:
We've made it to the end of all the changes we needed to make! Awesome job!
Now we have multiple sets of changes on three different branches. We can't see other branches unless in the
git log output unless we switch to a branch. Wouldn't it be nice if we could see allbranches at once in the git log output.
As you've hopefully learned by now, the
git log command is pretty powerful and can show us this information. We'll use the new --graph and --all flags:$ git log --oneline --decorate --graph --all
The
--graph flag adds the bullets and lines to the leftmost part of the output. This shows the actual branching that's happening. The --all flag is what displays all of the branches in the repository.
Running this command will show all branches and commits in the repository:

Recap Of Changes
We've made the following changes:
- on the master branch, we added a default color to the page
- we created a sidebar branch and added code for a sidebar
- on the master branch, we changed the heading of the page
- on the sidebar branch, we added more content to the sidebar
- we created a footer branch and added social links to the footer
These changes are all on their own, separate branches. Let's have Git combine these changes together. Combining branches together is called merging.
5. Merging
Remember that the purpose of a topic branch (like
sidebar) is that it lets you make changes that do not affect the master branch. Once you make changes on the topic branch, you can either decide that you don't like the changes on the branch and you can just delete that branch, or you can decide that you want to keep the changes on the topic branch and combine those changes in with those on another branch.
Combining branches together is called merging.
Git can automatically merge the changes on different branches together. This branching and merging ability is what makes Git incredibly powerful! You can make small or extensive changes on branches, and then just use Git to combine those changes together.
Let's see how this works, in theory. Pay attention to the two main types of merges in Git, a regular merge and a Fast-forward merge.
⚠️ Know The Branch ⚠️
It's very important to know which branch you're on when you're about to merge branches together. Remember that making a merge makes a commit.
As of right now, we do not know how to undo changes. We'll go over it in the next lesson, but if you make a merge on the wrong branch, use this command to undo the merge:
git reset --hard HEAD^
(Make sure to include the ^ character! It's a known as a "Relative Commit Reference" and indicates "the parent commit". We'll look at Relative Commit References in the next lesson.)
It's very important to know which branch you're on when you're about to merge branches together. Remember that making a merge makes a commit.As of right now, we do not know how to undo changes. We'll go over it in the next lesson, but if you make a merge on the wrong branch, use this command to undo the merge:git reset --hard HEAD^(Make sure to include the^character! It's a known as a "Relative Commit Reference" and indicates "the parent commit". We'll look at Relative Commit References in the next lesson.)
The Merge Command
The git merge command is used to combine Git branches:
$ git merge
When a merge happens, Git will:
- look at the branches that it's going to merge
- look back along the branch's history to find a single commit that bothbranches have in their commit history
- combine the lines of code that were changed on the separate branches together
- makes a commit to record the merge
The
git merge command is used to combine Git branches:$ git merge
When a merge happens, Git will:
- look at the branches that it's going to merge
- look back along the branch's history to find a single commit that bothbranches have in their commit history
- combine the lines of code that were changed on the separate branches together
- makes a commit to record the merge
Fast-forward Merge
In our project, I've checked out the master branch and I want it to have the changes that are on the footer branch. If I wanted to verbalize this, I could say this is - "I want to merge in the footer branch". That "merge in" is important; when a merge is performed, the other branch's changes are brought into the branch that's currently checked out.
Let me stress that again - When we merge, we're merging some other branch into the current (checked-out) branch. We're not merging two branches into a new branch. We're not merging the current branch into the other branch.
Now, since footer is directly ahead of master, this merge is one of the easiest merges to do. Merging footer into master will cause a Fast-forward merge. A Fast-forward merge will just move the currently checked out branch forward until it points to the same commit that the other branch (in this case, footer) is pointing to.
To merge in the footer branch, run:
$ git merge footer
This is what my Terminal displays after running the command:
In our project, I've checked out the
master branch and I want it to have the changes that are on the footer branch. If I wanted to verbalize this, I could say this is - "I want to merge in the footer branch". That "merge in" is important; when a merge is performed, the other branch's changes are brought into the branch that's currently checked out.
Let me stress that again - When we merge, we're merging some other branch into the current (checked-out) branch. We're not merging two branches into a new branch. We're not merging the current branch into the other branch.
Now, since
footer is directly ahead of master, this merge is one of the easiest merges to do. Merging footer into master will cause a Fast-forward merge. A Fast-forward merge will just move the currently checked out branch forward until it points to the same commit that the other branch (in this case, footer) is pointing to.
To merge in the
footer branch, run:$ git merge footer
This is what my Terminal displays after running the command:

Perform A Regular Merge
Fantastic work doing a Fast-forward merge! That wasn't too hard, was it?
But you might say - "Of course that was easy, all of the commits are already there and the branch pointer just moved forward!"...and you'd be right. It's the simplest of merges.
So let's do the more common kind of merge where two divergent branches are combined. You'll be surprised that to merge in a divergent branch like sidebar is actually no different!
To merge in the sidebar branch, make sure you're on the master branch and run:
$ git merge sidebar
Because this combines two divergent branches, a commit is going to be made. And when a commit is made, a commit message needs to be supplied. Since this is a merge commit a default message is already supplied. You can change the message if you want, but it's common practice to use the default merge commit message. So when your code editor opens with the message, just close it again and accept that commit message.
This is what my Terminal shows after using the default commit message:
Aaaand that's all there is to merging! It's pretty simple, isn't it? You might read a lot of material that makes branching and merging seem overly complicated, but it's really not too bad at all.
Fantastic work doing a Fast-forward merge! That wasn't too hard, was it?
But you might say - "Of course that was easy, all of the commits are already there and the branch pointer just moved forward!"...and you'd be right. It's the simplest of merges.
So let's do the more common kind of merge where two divergent branches are combined. You'll be surprised that to merge in a divergent branch like
sidebar is actually no different!
To merge in the
sidebar branch, make sure you're on the master branch and run:$ git merge sidebar
Because this combines two divergent branches, a commit is going to be made. And when a commit is made, a commit message needs to be supplied. Since this is a merge commit a default message is already supplied. You can change the message if you want, but it's common practice to use the default merge commit message. So when your code editor opens with the message, just close it again and accept that commit message.
This is what my Terminal shows after using the default commit message:

Aaaand that's all there is to merging! It's pretty simple, isn't it? You might read a lot of material that makes branching and merging seem overly complicated, but it's really not too bad at all.
What If A Merge Fails?
The merges we just did were able to merge successfully. Git is able to intelligently combine lots of work on different branches. However, there are times when it can't combine branches together. When a merge is performed and fails, that is called a merge conflict. We'll look at merge conflicts, what causes them, and how to resolve them in the next lesson.
The merges we just did were able to merge successfully. Git is able to intelligently combine lots of work on different branches. However, there are times when it can't combine branches together. When a merge is performed and fails, that is called a merge conflict. We'll look at merge conflicts, what causes them, and how to resolve them in the next lesson.
Merge Recap
To recap, the git merge command is used to combine branches in Git:
$ git merge
There are two types of merges:
- Fast-forward merge – the branch being merged in must be ahead of the checked out branch. The checked out branch's pointer will just be moved forward to point to the same commit as the other branch.
- the regular type of merge
- two divergent branches are combined
- a merge commit is created
To recap, the
git merge command is used to combine branches in Git:$ git merge
There are two types of merges:
- Fast-forward merge – the branch being merged in must be ahead of the checked out branch. The checked out branch's pointer will just be moved forward to point to the same commit as the other branch.
- the regular type of merge
- two divergent branches are combined
- a merge commit is created
Further Research
- Basic Merging from Git Book
- git-merge from Git Docs
- git merge from Atlassian blog
- Basic Merging from Git Book
- git-merge from Git Docs
- git merge from Atlassian blog
6. Merge Conflicts
Sometimes Merges Fail
Most of the time Git will be able to merge branches together without any problem. However, there are instances when a merge cannot be fully performed automatically. When a merge fails, it's called a merge conflict.
If a merge conflict does occur, Git will try to combine as much as it can, but then it will leave special markers (e.g.
>>> and <<<) that tell you where you (yep, you the programmer!) needs to manually fix.What Causes A Merge Conflict
As you've learned, Git tracks lines in files. A merge conflict will happen when the exact same line(s) are changed in separate branches. For example, if you're on a
alternate-sidebar-style branch and change the sidebar's heading to "About Me" but then on a different branch and change the sidebar's heading to "Information About Me", which heading should Git choose? You've changed the heading on both branches, so there's no way Git will know which one you actually want to keep. And it sure isn't going to just randomly pick for you!
Let's force a merge conflict so we can learn to resolve it. Trust me, it's simple once you get the hang of it! Remember that a merge conflict occurs when Git isn't sure which line(s) you want to use from the branches that are being merged. So we need to edit the same line on two different branches...and then try to merge them.
Forcing A Merge Conflict!
Remember that a merge conflict occurs when the exact same line(s) are changed in separate branches. Let's alter the page's heading on two different branches. So Let's:
- change the heading on the
masterbranch - create a
heading-updatebranch that's located on the commit right before the recently modifiedmasterbranch - change the same heading
- switch back to the
masterbranch - merge in the
heading-updatebranch
Change Heading On Branch 1
Since the
master branch is just a regular ol' branch like all the rest, let's just alter the heading while we're on the master branch. So change the
Once you've made the change, save the file and commit it to the repository.
Change Heading On Branch 2
Now we need to create a different branch and update the heading on that branch.
Now this is important, we need to create a branch that's not branching from the master branch. If we make a change that branches off of the master branch, then that change will be "ahead" of this one and Git will just use that change instead of the one we just made on
master. So we need to put the branch "in the past".
Let's just create a branch that's on the commit right before the most recent one. So use Git log to get the previous commit's SHA and create a branch on that commit. Here's what my Git log looks like after creating a
heading-update branch:
Ok, now that we've got our branch created, we just need to update the heading, again. Now make sure you change the exact same line that you changed on the
master branch. I'm changing "Adventure" on line 13 to "Crusade".
Then save the file and commit it to the repository.

Make sure you're on the master branch (we could really do this on either branch, but I just have a habit of keeping the master branch the main one that other topic branches get merged into) and merge in the heading-update branch:
$ git merge heading-update
You should see the following:
Make sure you're on the master branch (we could really do this on either branch, but I just have a habit of keeping the
master branch the main one that other topic branches get merged into) and merge in the heading-update branch:$ git merge heading-update
You should see the following:

Merge Conflict Output Explained
The output that shows in the Terminal is:
$ git merge heading-update
Auto-merging index.html
CONFLICT (content): Merge conflict in index.html
Automatic merge failed; fix conflicts and then commit the result.
git merge heading-update command, it tries merging the file that was changed on both branches (index.html), but that there was a conflict. Also, notice that it tells you what happened - "Automatic merge failed; fix conflicts and then commit the result".
Remember our good friend git status? Well he'll come in really handy when working with merge conflicts.
The output that shows in the Terminal is:
$ git merge heading-update
Auto-merging index.html
CONFLICT (content): Merge conflict in index.html
Automatic merge failed; fix conflicts and then commit the result.
Notice that right after the
git merge heading-update command, it tries merging the file that was changed on both branches (index.html), but that there was a conflict. Also, notice that it tells you what happened - "Automatic merge failed; fix conflicts and then commit the result".
Remember our good friend
git status? Well he'll come in really handy when working with merge conflicts.
The git status output tells us to that the merge conflict is inside index.html. So check out that file in your code editor!
The
git status output tells us to that the merge conflict is inside index.html. So check out that file in your code editor!
Merge Conflict Indicators Explanation
The editor has the following merge conflict indicators:
<<<<<<< HEAD everything below this line (until the next indicator) shows you what's on the current branch||||||| merged common ancestors everything below this line (until the next indicator) shows you what the original lines were======= is the end of the original lines, everything that follows (until the next indicator) is what's on the branch that's being merged in>>>>>>> heading-update is the ending indicator of what's on the branch that's being merged in (in this case, the heading-update branch)
The editor has the following merge conflict indicators:
<<<<<<< HEADeverything below this line (until the next indicator) shows you what's on the current branch||||||| merged common ancestorseverything below this line (until the next indicator) shows you what the original lines were=======is the end of the original lines, everything that follows (until the next indicator) is what's on the branch that's being merged in>>>>>>> heading-updateis the ending indicator of what's on the branch that's being merged in (in this case, theheading-updatebranch)
Resolving A Merge Conflict
Git is using the merge conflict indicators to show you what lines caused the merge conflict on the two different branches as well as what the original line used to have. So to resolve a merge conflict, you need to:
- choose which line(s) to keep
- remove all lines with indicators
For some reason, I'm not happy with the word "Crusade" right now, but "Quest" isn't all that exciting either. How about "Adventurous Quest" as a heading?!?

Commit Merge Conflict
Once you've removed all lines with merge conflict indicators and have selected what heading you want to use, just save the file, add it to the staging index, and commit it! Just like with a regular merge, this will pop open your code editor for you to supply a commit message. Just like before, it's common to use the provided merge commit message, so after the editor opens, just close it to use the provided commit message.
And that's it! Merge conflicts really aren't all that challenging once you understand what the merge conflict indicators are showing you.
Merge Conflict Recap
A merge conflict happens when the same line or lines have been changed on different branches that are being merged. Git will pause mid-merge telling you that there is a conflict and will tell you in what file or files the conflict occurred. To resolve the conflict in a file:
- locate and remove all lines with merge conflict indicators
- determine what to keep
- save the file(s)
- stage the file(s)
- make a commit
Be careful that a file might have merge conflicts in multiple parts of the file, so make sure you check the entire file for merge conflict indicators - a quick search for <<< should help you locate all of them.
<<< should help you locate all of them.Further Research
- Basic Merge Conflicts from the Git book
- How Conflicts Are Presented from the Git docs
7. Outro
Branches, merges, and merge conflicts.Branches let us work in isolation from the rest of the project.
Then after you've finished, you can use Git to merge your branches together.
If there's a merge conflict.
Just pop open your editor and search for the merge conflict indicators.
Remove the lines with the indicators, figure out what lines you're going to keep, save the file, stage the file, and then commit.


Thanks to Admin for Sharing such useful Information. I really like your Blog. Addition to your Story here I am Contributing 1 more Similar Story Common used Git Commands Checklist for Developers.
답글삭제